Getting Started with Your New Trezor
Welcome to the world of secure cryptocurrency management! If you’ve just acquired a Trezor hardware wallet, you’ve taken the first step toward safeguarding your digital assets. This guide will walk you through everything you need to know to get started, from downloading the necessary software to transferring your crypto securely.
What is Trezor?
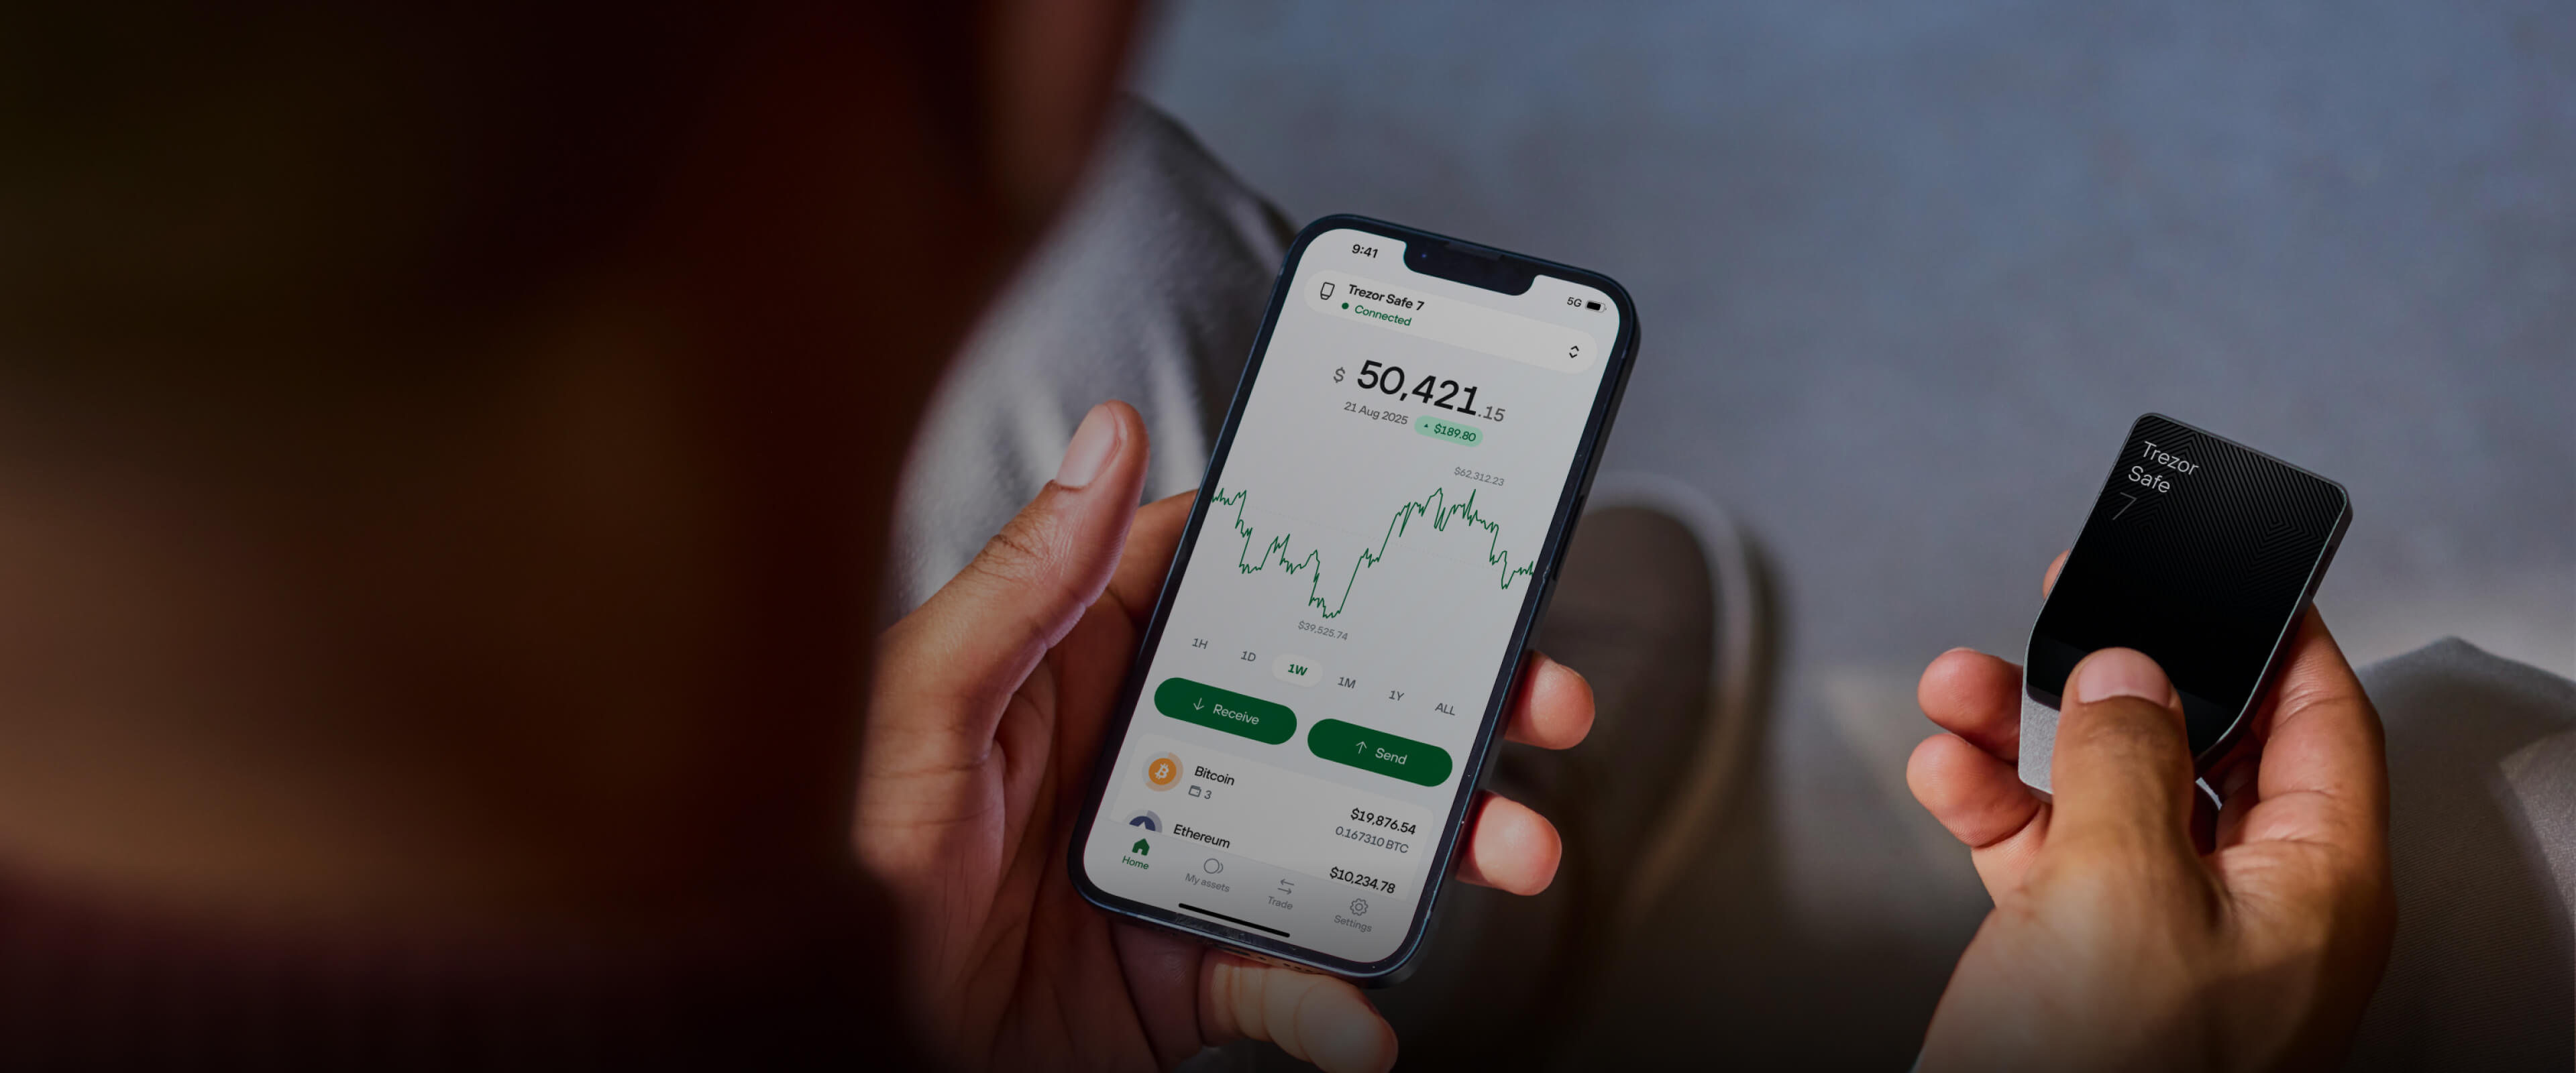
Trezor is a hardware wallet developed by SatoshiLabs designed to provide maximum security for your cryptocurrency holdings. Unlike software wallets that are susceptible to malware and hacks, a hardware wallet stores your private keys offline, ensuring that your assets remain safe even if your computer is compromised. With Trezor, you control your funds entirely, without relying on third-party exchanges.
Step 1: Download the Trezor Suite App
The first step in setting up your Trezor wallet is to download the Trezor Suite. This is the official desktop and web application that allows you to manage your crypto assets with ease.
- Desktop App: Recommended for the best user experience. Available for Windows, macOS, and Linux.
- Web App: Ideal if you prefer not to install software. Accessible directly from your browser.
To download, simply visit the Trezor website and choose the version compatible with your device. Always ensure you are downloading from the official source to avoid malicious copies.
Step 2: Install the App
If you chose the desktop version, installation is straightforward:
- Open the downloaded installer.
- Follow the on-screen instructions.
- Launch the Trezor Suite once installation is complete.
Web app users can skip this step and proceed directly to device setup.
Step 3: Set Up Your Trezor Device
Once the app is ready, it’s time to configure your Trezor hardware wallet. This process typically takes about 15 minutes.
Connecting Your Device
- Plug your Trezor into your computer using the supplied USB cable.
- The Trezor Suite app will detect your device automatically.
Creating a New Wallet
- Follow the prompts to create a new wallet.
- Trezor will generate a recovery seed, a set of 24 words that act as your master key.
- Write down the recovery seed and store it in a secure location. Never share it online or store it digitally.
Setting a PIN
- Choose a PIN to protect your device.
- A PIN ensures that even if someone has physical access to your Trezor, they cannot access your funds without the code.
Step 4: Transferring Your Crypto
With your wallet set up, you are ready to transfer your cryptocurrency from exchanges or other wallets.
Supported Coins
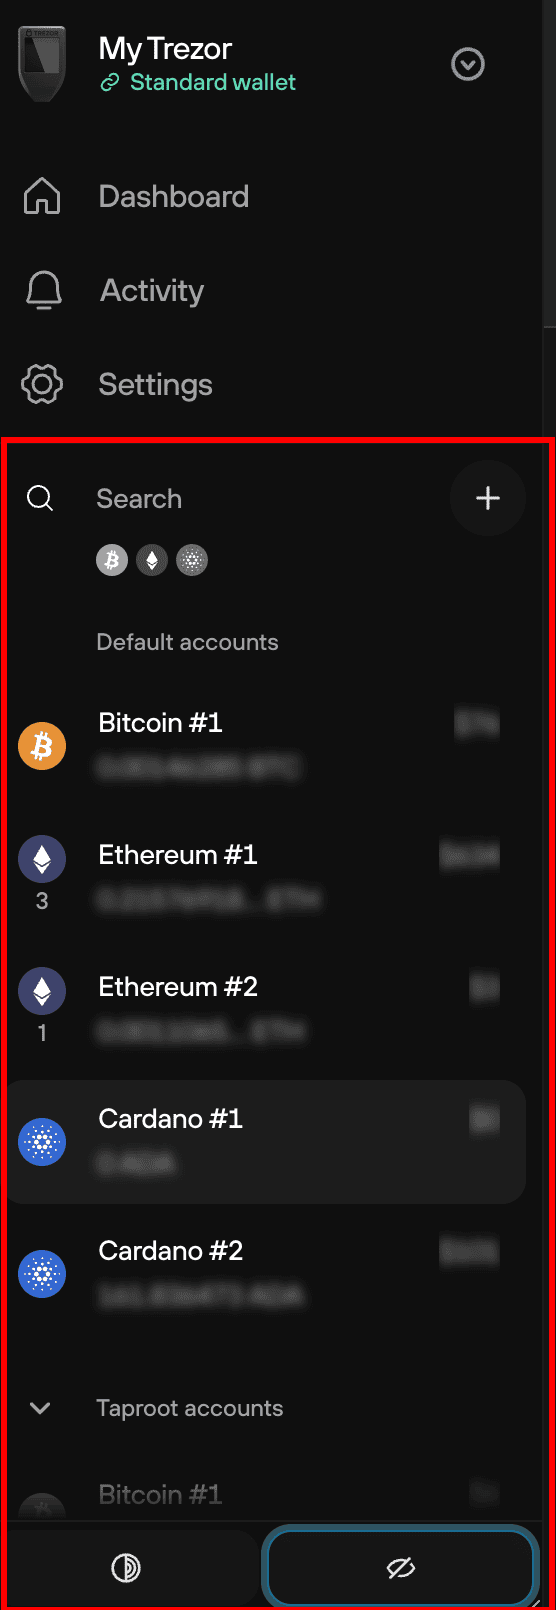
Trezor supports a wide range of cryptocurrencies, including Bitcoin, Ethereum, Litecoin, and many others. Always check the Trezor Suite for the latest list of supported coins.
Transferring Funds
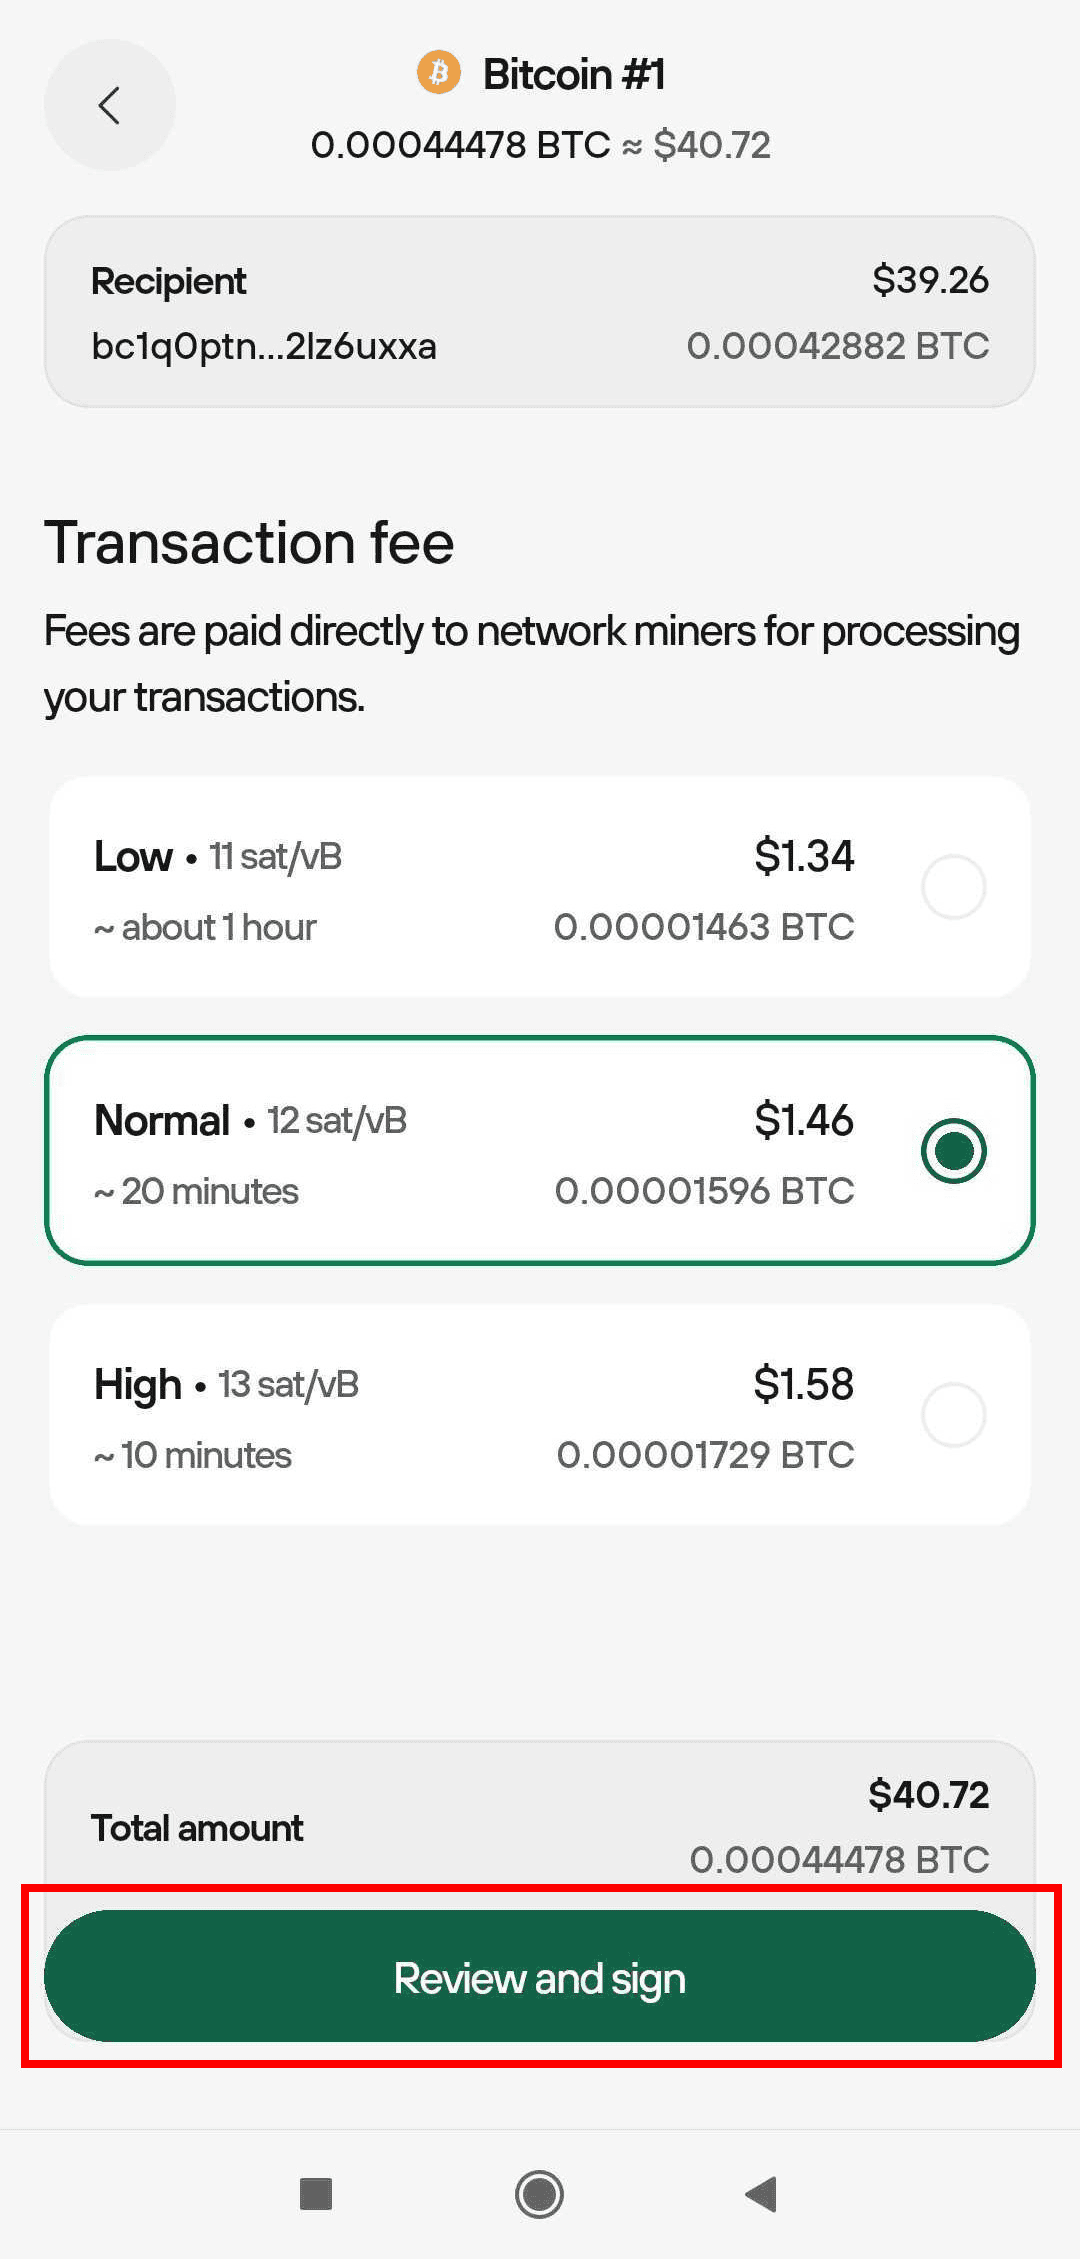
- Open the Trezor Suite and navigate to the coin you want to receive.
- Copy your wallet’s receiving address.
- Initiate a transfer from your exchange or existing wallet.
- Confirm the transaction on your Trezor device for added security.
Your funds are now securely stored offline, protected from online threats.
Security Best Practices
Owning a Trezor wallet significantly improves your security, but following best practices ensures maximum protection.
- Keep Your Recovery Seed Safe: Store it offline in a secure location. Consider using fireproof or waterproof storage solutions.
- Regularly Update Firmware: Trezor releases updates to enhance security. Always keep your device updated.
- Beware of Phishing: Only use official Trezor websites and applications. Avoid clicking on suspicious links.
- Use a Strong PIN: Avoid simple or predictable PINs.
Prefer Expert Guidance?
If you want personalized assistance, Trezor offers 1:1 Expert Onboarding Sessions.
- Duration: 60 minutes
- Format: Live online session
- Requirements: A Trezor hardware wallet and an internet connection
A Trezor expert will guide you through the setup process, answer questions, and ensure your wallet is configured securely.
Additional Features of Trezor
Beyond basic storage, Trezor provides several advanced features to enhance your crypto management:
- Portfolio Overview: Monitor all your assets in one place.
- Transaction History: Keep track of your deposits and withdrawals.
- Third-Party App Integration: Connect with other wallets and crypto services for added flexibility.
- Passphrase Support: Add an extra layer of protection for your funds.
Why Choose Trezor?
Choosing Trezor gives you peace of mind with a combination of security, usability, and transparency:
- Security: Private keys never leave the device.
- Reliability: Developed by SatoshiLabs, a pioneer in hardware wallets.
- Transparency: Open-source firmware and software.
- Ease of Use: Intuitive setup and user-friendly interface.
Common Questions
Q: Can I use Trezor on multiple devices? Yes, your wallet can be accessed via any computer or browser using your recovery seed.
Q: What if I lose my Trezor? You can restore your wallet on a new device using your recovery seed.
Q: Are my funds insured? Trezor itself does not provide insurance, but it secures your assets against online theft. Consider additional storage strategies for very large holdings.
Conclusion
Setting up your Trezor wallet is simple, secure, and essential for anyone serious about cryptocurrency. By following this guide, you can confidently manage your assets, knowing they are protected from online threats. Whether you prefer to set up the wallet yourself or with the help of a Trezor expert, your journey to secure crypto ownership starts today.